Posts

Circle Card featuring MFT Stamps

Image
Hello ๐Ÿค— Today's card features a super adorable stamp set from MFT stamps - SY Tea Party. I am absolutely in love with this set, it's got so many lovely and sweet images and I couldn't wait to get crafty! To start with I cut out a circle and ink blended a gradient between blue and green archival inks for the sky and grass respectively. I then cut another circle from white cardstock and then hand cut the grass. Next using alcohol markers I colored the grass. I used three different shades of green for this. I then stamped, colored and fussy cut all my images. To see how I assembled the card watch the video below๐Ÿ˜‰ Have a supercalifragilisticexpialidocious day! Cheers  Anisha๐Ÿ˜Š

Quick and Simple Scene Card

Image
Hi there๐Ÿ˜Š I hope you are having a wonderful day! I wanted to share this super fun card, with a little bit of a scenery! To start I colored my image using watercolors and color pencils, following which I fussy cut my little critters. I then took a piece of white cardstock and cut a mask to use for the snow. Using some blue Archival ink and blending brushes I blended two shades of blue ink while keeping the snowy mask stuck to my card base. I then added some very faint lines to the snow using watercolors, to create some extra dimension. Next I matted my white piece of cardstock on dark blue cardstock and again on white cardstock. Finally I added stitched lines and white paint splatters to finish the card! I hope you liked it๐Ÿฅฐ. Have a wonderful day! Cheers  Anisha๐Ÿค—

Creating your own pet animals out of paper!

Image
Hello There  I hope you are having a good day!๐Ÿ˜‡ Today's project is yet another different project from what I usually undertake, but I enjoy pushing my crafty boundaries once in a while.๐Ÿ˜‚ Here are some of the pictures of the project To start I used newspaper to make my base. I made two balls one larger than the other and used it for the head and body of my little penguin. I stuck the head and body together using masking tape. I then tore some strips of newspaper and using a mixture of glue and water I began adding layers to my body. I added the layers in such a way so that the body looked more fuller and all the gaps and uneven surface could be covered up. I also made the beak in the same manner. Then I let it dry for a day or two. To make it a bit more fun, I used different patterns of decoupage paper to decoupage my little penguin. And that's it !

Upcycling and Redesigning

Image
Hello There ๐Ÿค— I hope you are having a great day!! Today's project is different from what I usually undertake, but it's fun to try something different once in a while!๐Ÿ˜ Here are some of the pictures of the project To give you a better idea, here is a picture of the insides of the decor piece. So now that you have idea of what this home decor piece looks like, let's get started on how I put it together and what I used. In the true spirit of this Challenge I wanted to use something that really would have gone into the trash can, if it wasn't upcycled. I had a few sheets of cardboard, that came along with the bedsheets that I bought recently. The first step was to cut the all the hexagon pieces, to actually put the box together. I drew a template and cut all the pieces. Next I began the assembly, I used masking tape to stick all the pieces together. This was definitely the most time consuming part because each piece had to a...

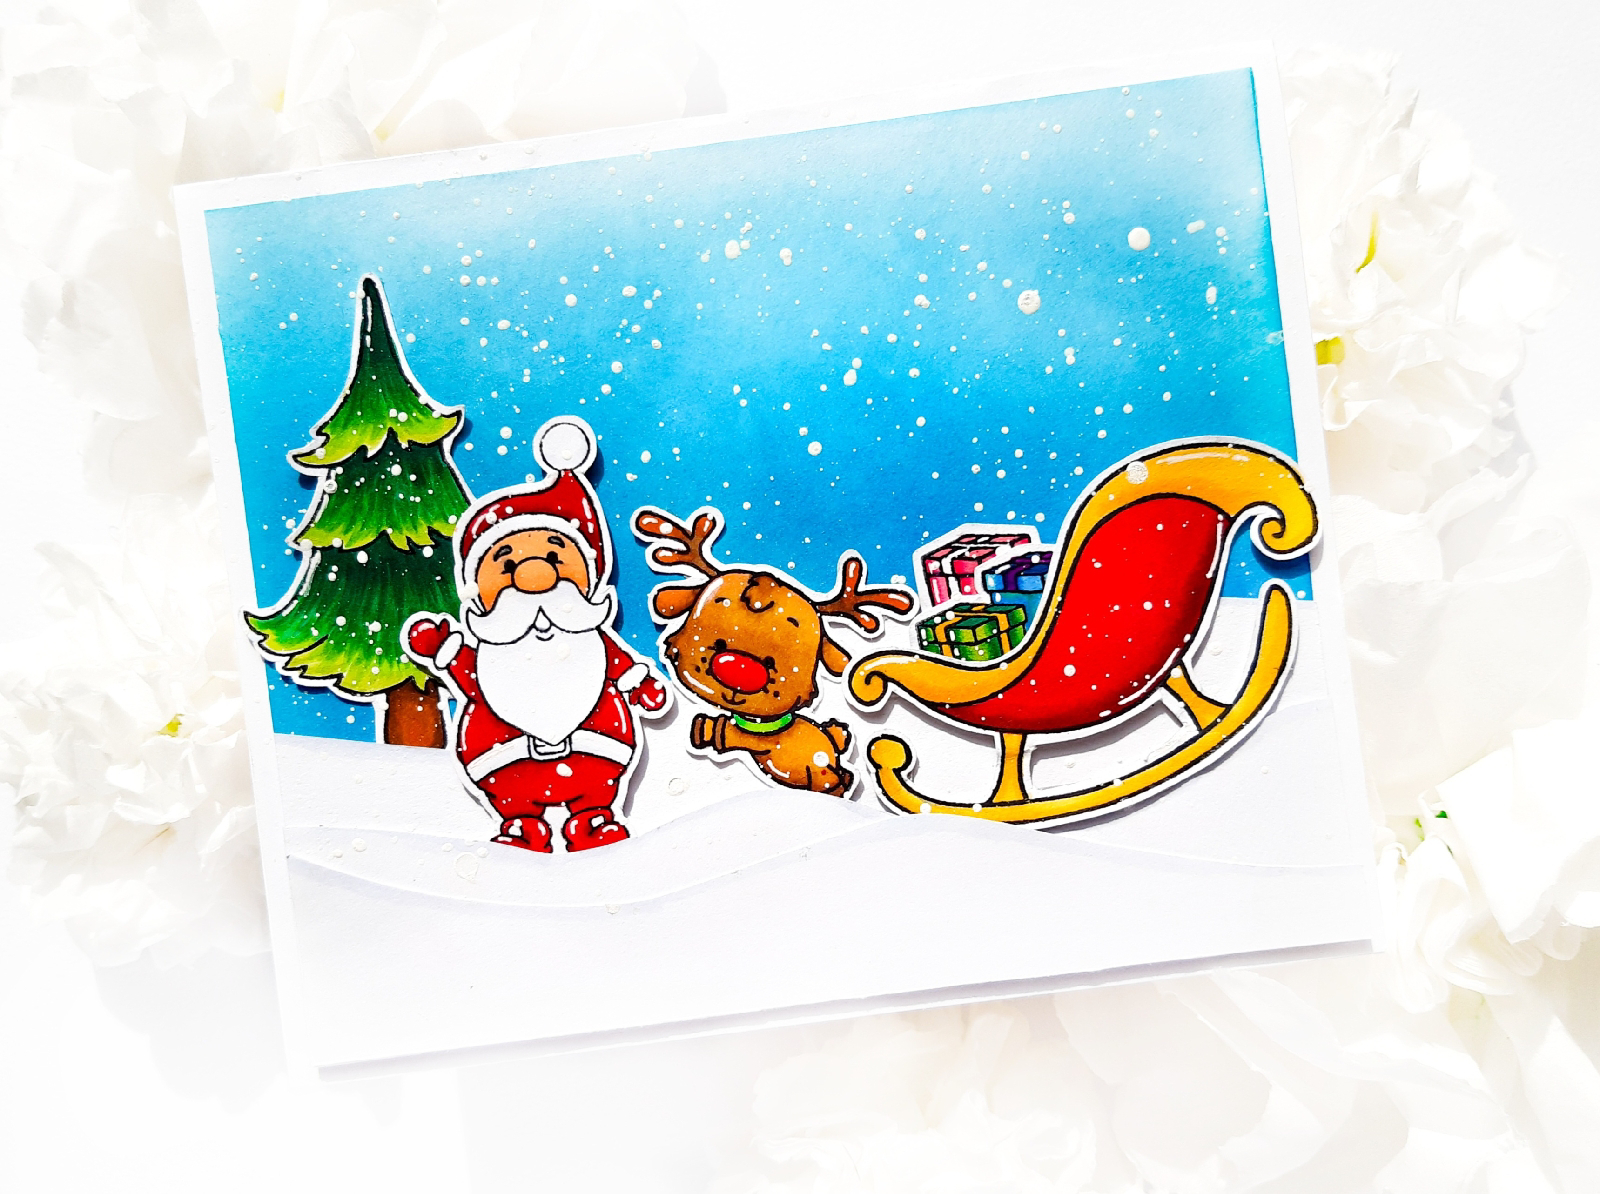
Fun Christmas Scene Card

Image
Hello ๐Ÿ˜Š I hope you are having a lovely day! Here's the card we are making today. Today's card also features my first attempt at using alcohol markers ๐Ÿ˜‚. To start I stamped all images, colored them with alcohol markers and then fussy cut them. Next I worked on my background. I used two different shades of blue Archival ink and a blender brush to create my background. For the layers of the snow, I handcut three different layers of snow and then using a grey marker I went along the edges of the snow to make sure each layer could be seen clearly. I then adhered the layers over my background piece using foam adhesive. Finally I added all my stamped elements. To bring the whole card together I added some white paint splatter so that it looked like falling snow. That's it for today's card. Find me on  Instagram : @anishascraftstudio Have a lovely day! Cheers  Anisha๐Ÿ˜Š

Floral Christmas Card with a Twist

Image
Hello there ๐Ÿ˜Š I hope you are having a lovely day! This year has been such a whirlwind, many of us haven't got the opportunity to meet our loved ones, and sometimes all we can do is send an " I love you " and a card that feels like a warm hug. So this year for some o my Christmas cards, I used different sentiment stamps to make the cards more personal and closer to the heart.❤ For this card I started by stamping the Mudra Mogra stamp multiple times on watercolor paper and then added gold embossing powder and heat set it. I then watercolored my flowers using crimson red and viridian hue watercolors. I then adhered my watercolor piece onto green cardstock using foam adhesive. Finally I stamped my sentiment and then heat embossed. I added a green mat to the sentiment strip. To finish of the card I added white paint in the form of a splatter using a brush. That's it for today's card. I hope you liked it! Find me on  Instagram : @anishascraftstudio Taking p...

Slimline Christmas Card

Image
Hello! I hope you are having a lovely day! In today's card I used a number of stamp sets to create Christmas themed cards. I didnt have any of my Christmas stamp sets as I was travelling so I had to improvise๐Ÿ˜‚ To start with today's card, I cut 3 square pieces of white cardstock and used a stencil brush and two different green inks to create the green background. Next I stamped my images on white and cardstock and colored them using watercolors and color pencils. After I cut my images, I adhered it into my green square pieces. Next I added a white mat to my green pieces, and then I used red cardstock to create a slimline cardbase and adhered my squares onto it using foam adhesive. To finish of the card I added some white paint using a brush and white paint. I hope you liked the card!๐Ÿ˜Š Have a wonderful day! Supplies Used  Mudra Magical Mushroom Stamp :  https://mudrastamps.in/product/magical-mushroom-craft-stamps/ Mudra Barn Red Cardstock :  https://mudrastamp...